

After creating a frame by frame running animation we decided that it would take way too much time to animate everything by hand. Unfortunately at this point, the only type of animation I was familiar with was the traditional type. Having no other option I started researching different animation types. I came across a type of animation where you essentially use 2D puppets to create movement. Instead of having to animate every frame myself, I could now modify the position of ‘bones’ to make my animation. This seemed like a perfect solution to my problem. I would have to create one character drawing and the animating software would help me to bring the character to life. After countless hours of watching tutorials on youtube and heavy research, I gathered enough information about the new type of animation and felt ready to take on the new challenge.
First I had to download the correct version of unity from Unity archives. For our game we use :

What I learned:
Rigging a sprite with 2D Animation Package
Working with 2D sprites, I had to gig the character by embedding a skeletal rig onto the sprite. When the bones were applied to the 2D Character it enabled the 2D sprite characters ability to be animated by moving and transforming the character along with its associated range of skeletal pivot points.
The 2D animation package allowed me to rig sprites the same way as it was a 3D model. I had to download the 2D Animation package from the Package Manager.

Package Manager from Unity engine
Rigging a 2D Character Sprite
In order to start rigging a 2D Character Sprite Assets, I had to create a PSB file which the character. Every body part had to be on a separate layer so Unity can divide the character into individual body parts.// using the … package// I wish I knew about this function sooner because before I had to make the sprite assets with the individual body parts by hand. The process was long and in the end, I had to do more work blocking out boxes for each part.

ClipStudio Paint - Drawing process


PNG - made in CSP
Skinning Editor in Unity engine
Understanding the skinning editor
I used the skinning editor to create a skeleton in the character rigging process. The skeleton is bonded to the sprite itself. The skinning editor consists of three sections - bones, geometry and weights

Skinning Editor - Bones
Bones
First I had to create a bone for every body part. In the ‘bones’ section of the editor I had four options :
-
Preview Pose - this allowed me to move and rotate bones to see how the rigging affects my character pose. At this stage, I could connect, disconnect and reposition the bones without any permanent changes
-
Edit Joints - once the bones were created this tool allowed me to move/connect/disconnect the bones just by simply dragging them
-
Create Bone - pretty self-explanatory, this tool allowed me to create bones. The bones are created in a certain hierarchy. The parent bones influence the child’s bones by default. If I wanted to separate this connection and create an independent bone all I had to do was just right-click or press ESC to break any connection
-
Split bone - this tool allowed me to split a single existing bone into two


Skinning Editor - Bones
Skinning Editor - Preview Pose

Skinning Editor - Geometry
Geometry
Auto Geometry: Auto Geometry automatically creates a mesh with the existing bones for the Sprite. The bones are weighted according to their influence on the vertices, and the colours of the mesh are derived from the bones. - this tool was extremely useful, I could edit the character and with one click Unity engine would adapt to a new design.
Edit Geometry: This allowed me to move and delete edges and vertices. If I deleted a border, Unity only retains the vertices that were already set. // Interior edge information is lost until the surface is closed again or until Auto Geometry is used.
Create Vertex: This allowed me to create a vertex, automatically creating edges to connect it to neighbouring vertices.
Create Edge: This allowed me to create an edge between two existing vertices, or one existing vertex and a new one placed where you click.
Split Edge: This splits the edge nearest your mouse by creating a new vertex where you click, connecting it with both endpoints of the original edge.

Skinning Editor - Geometry
Skinning Editor - Weights
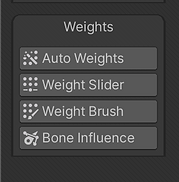
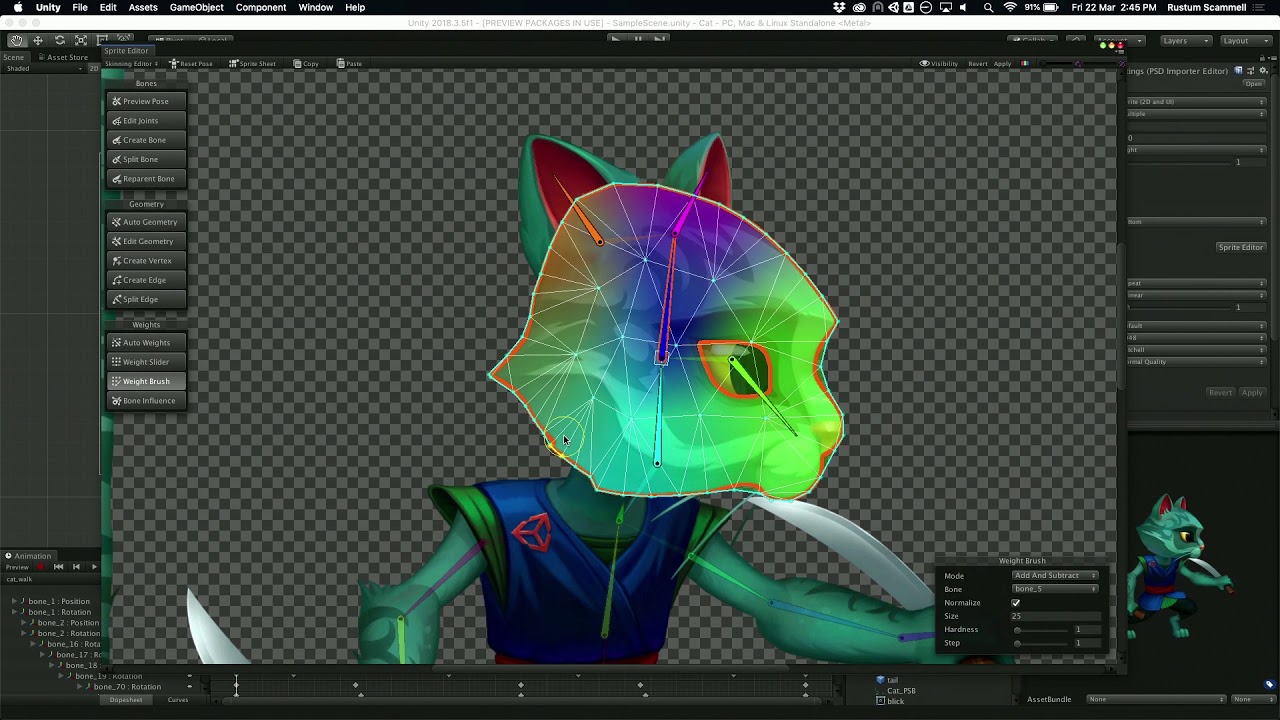
Weights
Auto Weights: This will open a panel that can automatically generate, normalize, or clear bone weights.
Weight Slider - Selected vertices can be adjusted via a set of sliders // I haven’t used that option.//
Weight Brush - This allows you to select a bone and paint its area of influence using a traditional digital paintbrush. Size, Hardness, and Step work as they do in paint programs such as Photoshop and ClipStudio Paint. This tool was the most useful tool to fix imperfections created by Unity. The best part was that you can actually see in real-time the fixing process and is greatly satisfying.

Skinning Editor - Weights
Fixing the bone weight using the Weight Brush
Animation
Animating already rigged character was relatively easy. I used a run cycle cheat sheet from the animator's survival kit as a reference and I moved the bones to the right position. After I was done with the key poses tweaked some in-between frames until I was satisfied with the effect. I also followed a youtube tutorial on making run animation in Unity.

I followed this drawing from The Animator's Survival Kit by Richard Williams to create key frames
The Final Resoult
What I learned
I learned about all the features of the 2D Animation package, including Bones, Weights and Sprite Skins.

Tutorials I followed