

Animation
I started my animation process by expanding my knowledge about animation - especially running animation in games.
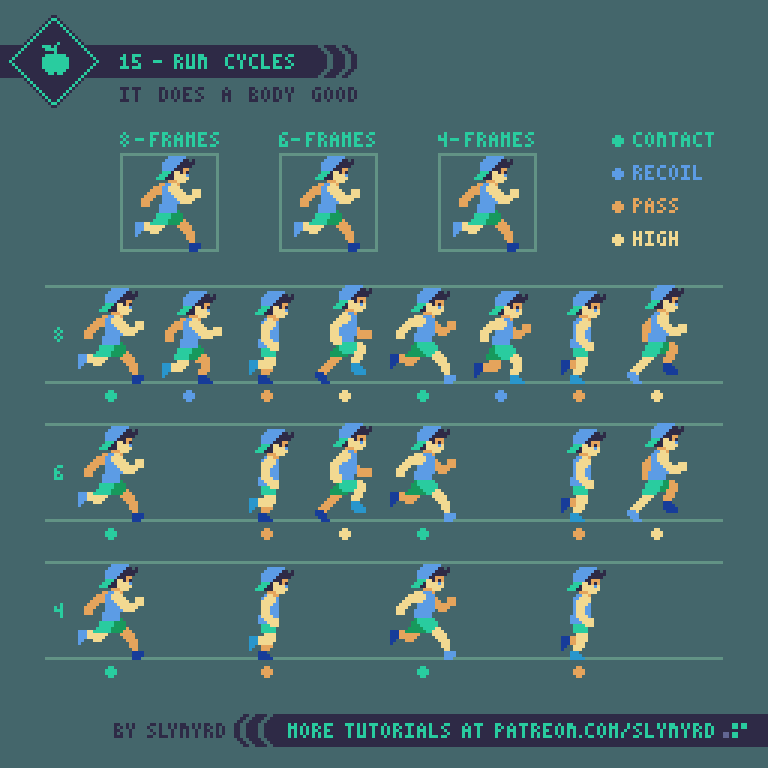
I found this youtube video the most useful. It explained the importance of strong keyframes, how to smooth out the animation with inbetweens, the number of frames and also the history of animation in games.
I learned that you can create movement with just 2 frames. // Mario//
However, in order to make my animation more believable, I need more frames.
My plan was to research the keyframes for running animation and based on them create a simple sketch animation.
Step by Step
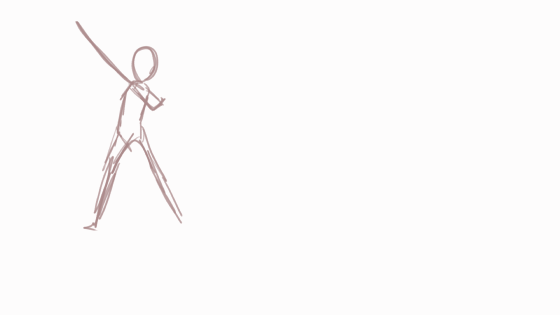
I started by creating 4 simple keyframes to create a movement.

After testing the run I added an outline to see the movement better and to prepare myself for future details.
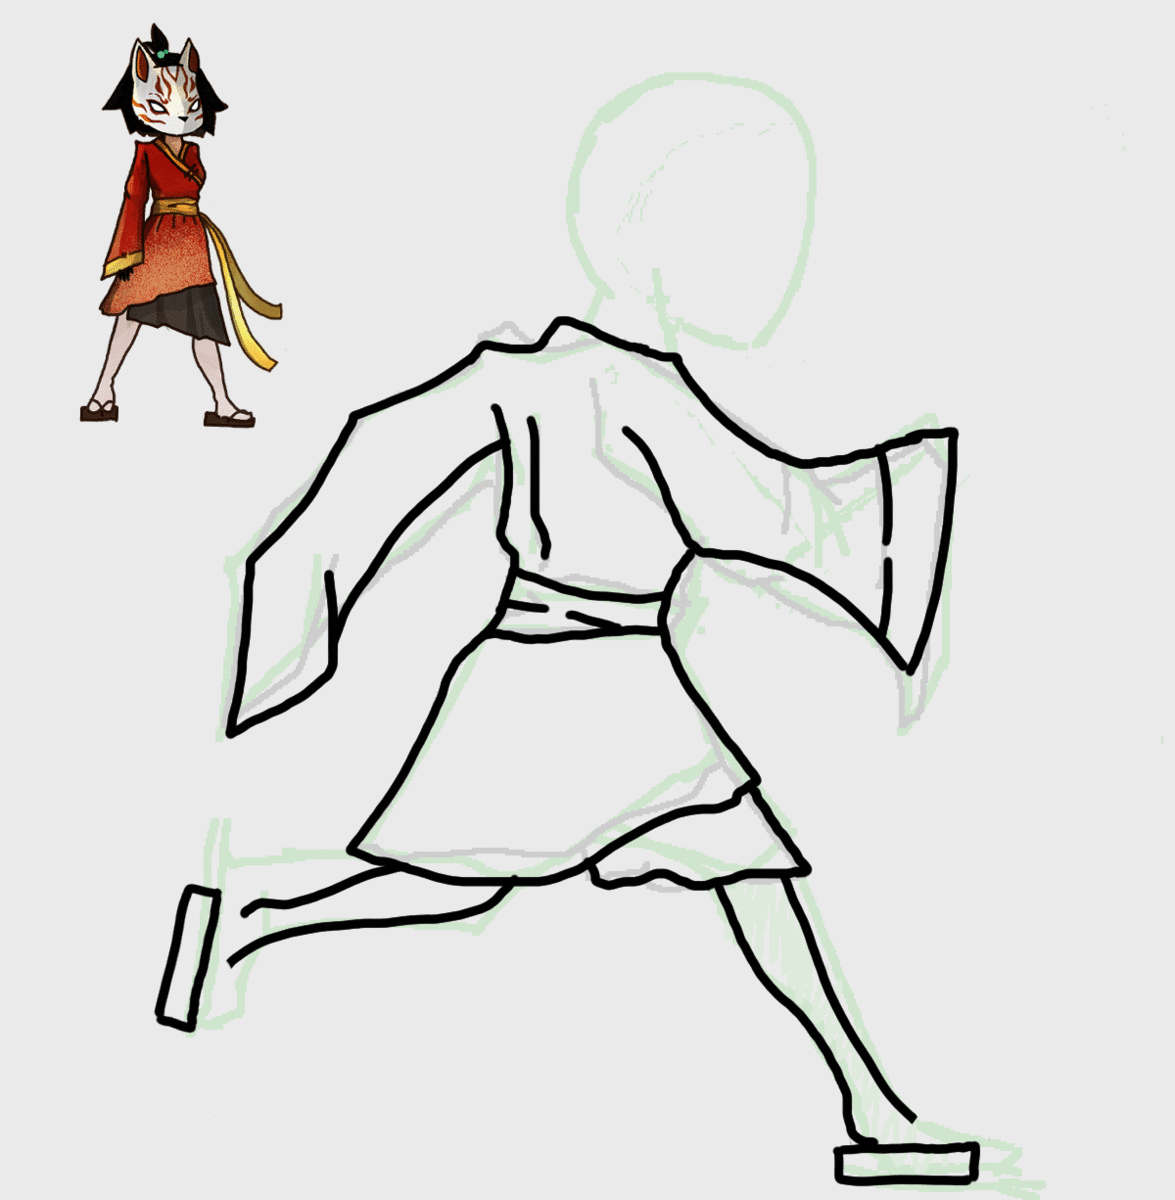
The next step was to fix the movement of the clothes by adding some in-betweens to make the animation smoother. // at this point she looks like she's jumping//
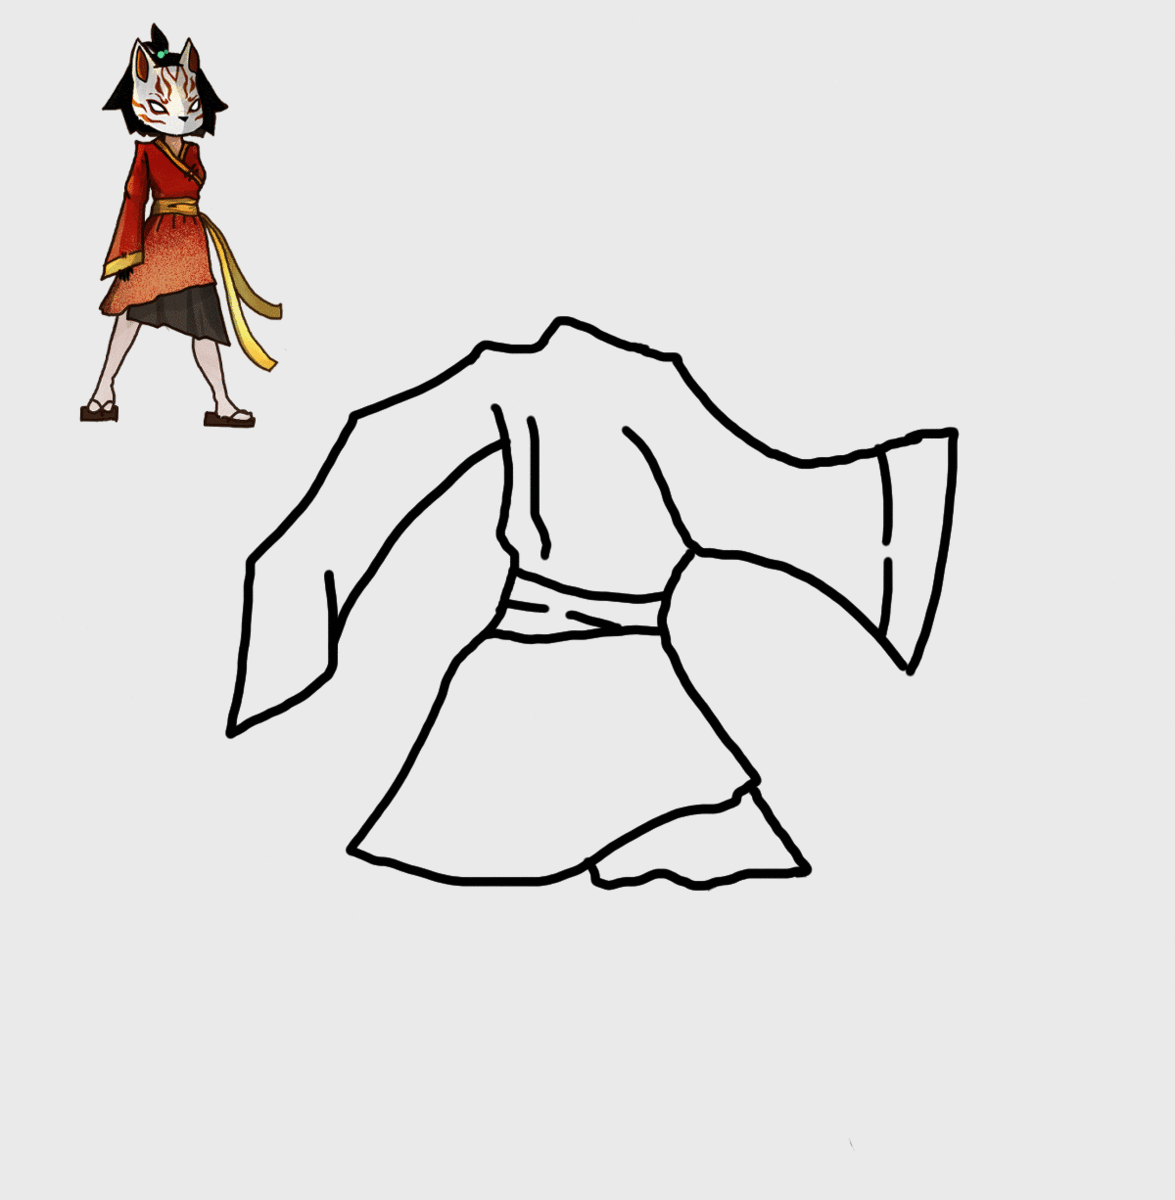
I decided to add legs hoping it would fix something. Sadly she still looks like she's jumping. At this point, the animation was taking too much time and the thought of animating every single action wasn't helpful so, I decided to switch the type of animation from frame by frame to rigging.

The section about rigging can be found here :
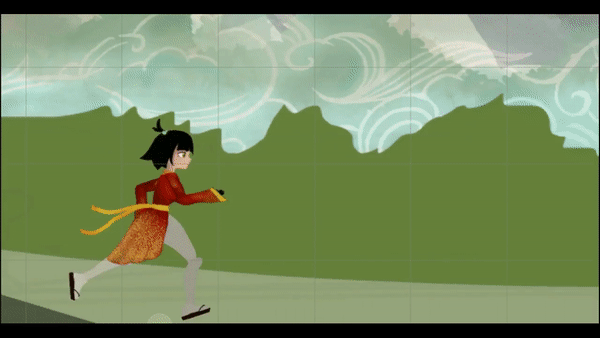
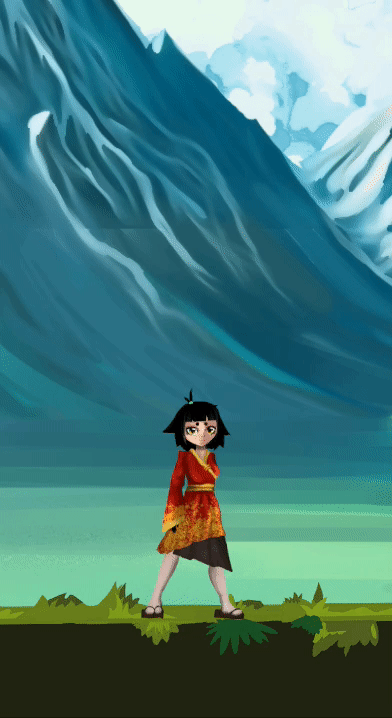
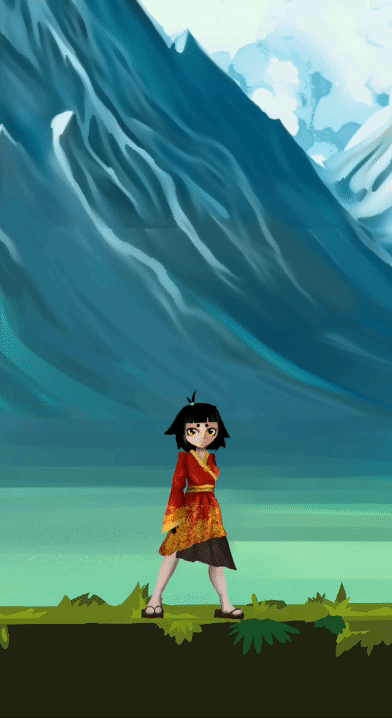
After learning how to rigg I was pleasantly surprised how the final thing turned out plus I could reuse the same model for other animations in the future which would save me and my group a lot of time.
Attack Animation
The next animation I took on was the attack animation. I started again by crating a few simple keyframes to create a movement.
After I could see a general idea of the movement I added more frames as well as the smear. This technique allowed me to uses one single “smeared” frame of animation to fudge over all the individual frames of a fast action. As a result, I got to draw fewer frames saving time.

After I was satisfied with the movement it was time to add colour and details.

However, at this point, some other assets were essential to make so the animation process was cut short and put on hold. Instead of actual animation, I decided to create one frame to mimic the movement of the action. I created one design for each world.


After testing it in the game I was surprised how good it looked.
As a team, we even considered keeping it as the final version. The character movement plus the running animation are tricking the eye that there're more frames that works in our favour.
Jump Animation


I followed the same rule for the jumping animation. Creating just one frame for each world I was able to create the illusion of a movement.
Idle Animation
Using the same principles as for the running animation I edited the already existing file of the character design into Unity friendly PSB file with every part on a different layer. Later I imported the file to Unity and started rigging. I repositioned the bones to create the desired movement. In the end, I was really pleased with the effect it created.

Enemy Attack Animation


Based on Natasza's enemy design I created the enemy assets.
The character on the left is the 'idle version' of the enemy.
The player would see him walking around and patrolling the area. Once the enemy spots the player he would approach them and attack. By doing that the visuals would switch to create an illusion of a movement.